How Do I Start Climbing Outdoors After Practicing Indoors?
Transitioning to the Great Outdoors
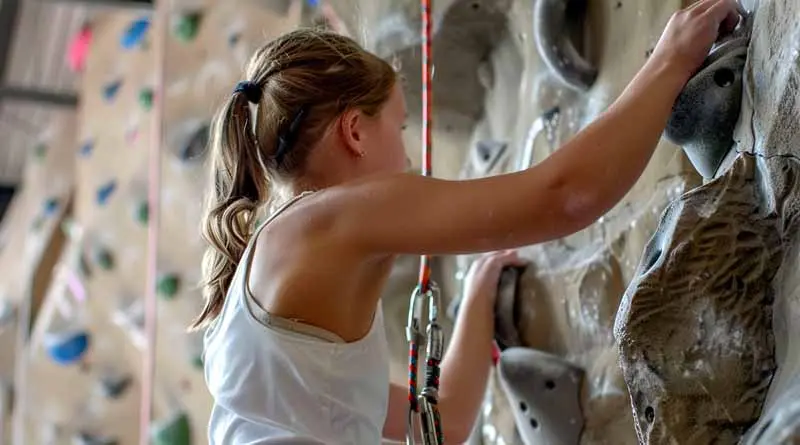
Under the artificial glow of indoor climbing gyms, I honed my skills, learned the ropes, so to speak, and was surrounded by walls that mimicked the great outdoors. Yet, the question lingered in my mind like the scent of chalk in the air, “How do I start climbing outdoors after practicing indoors?” Every climber must make this transition from a controlled environment to the wild, where rock faces are not man-made but rather the result of nature.
Transitioning from indoor to outdoor climbing presents a myriad of challenges and obstacles that go beyond just different climbing surfaces. The unpredictability of natural environments means weather, rock quality, route finding, and safety considerations all play a much bigger role than indoors. Indoors, routes are marked clearly; outdoors, the path you take can be less defined, with natural features that require interpretation and a keen eye.
The Path to Outdoor Climbing
1. Understanding the Environment
Understanding the environment is paramount in transitioning from indoor to outdoor climbing. Start by researching climbing locations near you, focusing on the different types of rock you’ll encounter:
- Granite: offers solid, abrasive surfaces that are great for grip but can be tough on the skin.
- Sandstone: is generally softer and more porous, which can provide a different kind of friction but may also be more susceptible to weathering and erosion.
- Limestone: often features sharper holds and may include more vertical or overhung routes.
Learning about the climate and weather patterns of these areas is also crucial, as conditions can significantly affect both the safety and the experience of your climb. Knowing when the rock is likely to be wet, icy, or overly hot can help in planning successful and safe climbing excursions.
2. Safety and Preparation
Safety is even more critical outdoors than indoors due to the variables introduced by natural settings:
- Rock Stability: Before climbing, learn to identify loose rocks and potentially dangerous formations.
- Anchor Setup: Understand different anchoring techniques appropriate for various rock types and conditions.
- Rescue Procedures: Familiarize yourself with the basic rescue techniques and local emergency procedures. Attending a safety course or a workshop focused on outdoor climbing can be highly beneficial.
3. Equipment Transition
Transitioning to outdoor climbing means adjusting your gear to match the environment:
- Helmets: are essential for protecting against falling rocks and impacts during falls.
- Ropes: Outdoor climbing often requires longer and more durable ropes compared to indoor climbing.
- Protection Gear: Learn about and acquire the necessary protection gear, such as cams, nuts, and quickdraws, for sport or traditional (trad) climbing.
- Shoes: Outdoor climbing may require different types of shoes based on the terrain—more aggressive shoes for overhung routes and more comfortable ones for longer multi-pitch climbs.
4. Finding a Mentor or Group
Climbing with experienced outdoor climbers can accelerate your learning curve and enhance your safety:
- Mentorship: A mentor can provide personalized guidance and insights that are invaluable when starting out.
- Climbing Groups: Joining a climbing group can provide a supportive learning environment and the opportunity to make new friends with similar interests.
5. Start Small and Build Confidence
It’s important to start with what you can handle and gradually push your boundaries:
- Begin with Easier Routes: Choose well-traveled routes that are known for their solid rock and good bolt placements.
- Build Confidence: As you become more comfortable, you can start exploring less traveled paths and more challenging routes.
Implementation of Outdoor Climbing
To ensure a smooth transition, it’s essential to be methodical:
- Climbing Checklist: Create a checklist that includes weather conditions, gear checks, and route planning.
- Local Climbing Clubs: Engage with local climbing communities for the latest advice on routes and safety.
- Practice Sessions: Use bouldering areas to practice your skills in a low-risk environment before moving to higher and more isolated routes.
By focusing on these areas, new outdoor climbers can enjoy a safer and more satisfying transition to the great outdoors, blending the skills learned indoors with the demands and rewards of natural rock climbing.
Resources and Tools Needed
- Guidebooks and apps are essential for route information and navigation.
- Personal Protective Equipment: Helmets, ropes, and appropriate climbing hardware.
- First Aid Kit: A must-have for handling minor injuries on-site.
- Climbing Workshops: Look for local courses on outdoor climbing techniques and safety.
Conclusion
Transitioning from indoor to outdoor climbing is like opening a new chapter in your climbing journey. It’s a move from the predictable to the unpredictable, from the manufactured to the majestic. Out here, the routes are not just paths you climb, but challenges that invite you to read the rock, understand its story, and become part of its ancient narrative. Each climb teaches you more about the rock and, inevitably, more about yourself. So lace up your shoes, check your gear, and step into the grand arena of nature’s own climbing gym.


